引言(Introduction):从基础概念出发,手把手抒写Linux CPU采集程序,并在后面的一个章节里简述经常出现的问题。本文主要环境以centos 7 上进行的一系列研究,其他版本Linux可能会有些出路,但总体思路不变。
Linux CPU使用率采集程序编写
-

- From: 我知他风雨兼程途径日暮不赏
- 2020/10/20 14:37
- Default
- linux
- 3316
linux: 28 items found.
引言(Introduction):从基础概念出发,手把手抒写Linux CPU采集程序,并在后面的一个章节里简述经常出现的问题。本文主要环境以centos 7 上进行的一系列研究,其他版本Linux可能会有些出路,但总体思路不变。
/etc/fstab 是 Linux 和其他类 Unix 操作系统的配置文件,用于描述文件系统。它包含有关文件系统的位置、挂载点、文件系统类型和挂载选项的信息。
/etc/fstab 的每一行描述一个文件系统,格式如下:
<file system> <mount point> <type> <options> <dump> <pass>
<file system> 是文件系统的位置,可以是设备文件(如 /dev/sda1)、分区 UUID(如 UUID=6c38203b-0ddc-4e35-a4a7-60733e8c1532)或文件系统标签(如 LABEL=MyDataPartition)。<mount point> 是文件系统在文件系统层次结构中的挂载点。<type> 是文件系统的类型,如 ext4、xfs 或 swap。<options> 是挂载该文件系统时使用的选项,如 rw(可读写)、ro(只读)或 noatime(不更新访问时间)。<dump> 指定文件系统是否应由 dump 程序备份。0 表示不备份,1 表示备份。<pass> 指定文件系统在 fsck 程序检查文件系统时应经过的检查次数。0 表示不检查,1 表示检查一次,以此类推。以下是 /etc/fstab 中的一些常见示例:
/dev/sda1 / ext4 rw,relatime 0 1
/dev/sda2 /home ext4 rw,relatime 0 2
/dev/sda3 /data ext4 rw,relatime 0 3
/dev/sdb1 /mnt/backup ext4 rw,relatime 0 0
/dev/sdc1 swap swap defaults 0 0
在上面的示例中:
/dev/sda1 是根文件系统,挂载在 /。/dev/sda2 是 /home 目录的文件系统,挂载在 /home。/dev/sda3 是 /data 目录的文件系统,挂载在 /data。/dev/sdb1 是备份文件系统,挂载在 /mnt/backup。/dev/sdc1 是交换分区,用于虚拟内存。您可以使用 mount 命令挂载文件系统,也可以使用 umount 命令卸载文件系统。
有关 /etc/fstab 的更多信息,请参阅 man fstab 手册页。
在云服务器 ECS Linux 系统中,有时需要在系统中测试端口的连通性,以便确认系统的TCP、UDP协议栈是否可以正常运行。本文对此进行简要说明。
pip 安装gevent时报出这些错:
重点看这个:ERROR: Failed building wheel for cffi
64位系统安装踩搞不少,很多apt都装不了,只能看官方有没有deb包,实在不行就需要编译安装。
可以从这里找docker的包
https://download.docker.com/linux/debian/dists/buster/pool/stable/armhf/
需要下载这三个 wget xxx
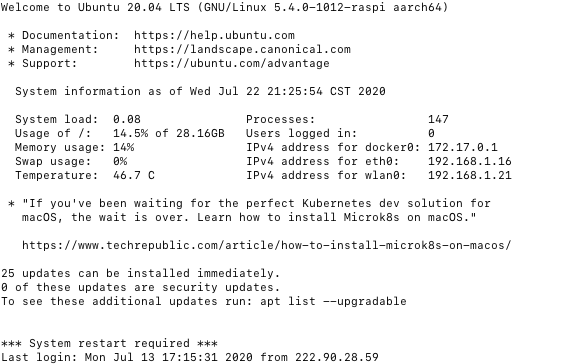
本文的目的是在Ubuntu 20.04 Focal Fossa Linux上禁用动态motd和新闻。
先来看看flock -h 的用法:
Usage:
 flock [options] <file|directory> <command> [command args]
 flock [options] <file|directory> -c <command>
 flock [options] <file descriptor number>

Options:
 -s  --shared             get a shared lock
 -x  --exclusive          get an exclusive lock (default)
 -u  --unlock             remove a lock
 -n  --nonblock           fail rather than wait
 -w  --timeout <secs>     wait for a limited amount of time
 -E  --conflict-exit-code <number>  exit code after conflict or timeout
 -o  --close              close file descriptor before running command
 -c  --command <command>  run a single command string through the shell

 -h, --help     display this help and exit
 -V, --version  output version information and exit

For more details see flock(1).
Go(又称Golang)是Google开发的一种静态强类型、编译型、并发型,并具有垃圾回收功能的编程语言。
官方网站的文档 https://golang.org/doc/
问题来源于raspberry pi4 安装了打印服务,但是cups服务有点异常报,/etc/securetty找不到。
查了下应该是ubuntu 20.04的bug.
root@ubuntu:~# systemctl status cups
● cups.service - CUPS Scheduler
     Loaded: loaded (/lib/systemd/system/cups.service; enabled; vendor preset: enabled)
     Active: active (running) since Wed 2020-07-01 00:58:26 CST; 12min ago
TriggeredBy: ● cups.path
             ● cups.socket
       Docs: man:cupsd(8)
   Main PID: 8324 (cupsd)
      Tasks: 2 (limit: 4434)
     CGroup: /system.slice/cups.service
             ├─8324 /usr/sbin/cupsd -l
             └─9318 /usr/lib/cups/notifier/dbus dbus://

Jul 01 01:08:15 ubuntu cupsd[8324]: pam_unix(cups:auth): Couldn't open /etc/securetty: No such file or directory
Jul 01 01:08:15 ubuntu cupsd[8324]: pam_unix(cups:auth): Couldn't open /etc/securetty: No such file or directory
Jul 01 01:08:22 ubuntu cupsd[8324]: pam_unix(cups:auth): Couldn't open /etc/securetty: No such file or directory
Jul 01 01:08:22 ubuntu cupsd[8324]: pam_unix(cups:auth): Couldn't open /etc/securetty: No such file or directory
Jul 01 01:08:27 ubuntu cupsd[8324]: pam_unix(cups:auth): Couldn't open /etc/securetty: No such file or directory
Jul 01 01:08:27 ubuntu cupsd[8324]: pam_unix(cups:auth): Couldn't open /etc/securetty: No such file or directory
Jul 01 01:08:29 ubuntu cupsd[8324]: pam_unix(cups:auth): Couldn't open /etc/securetty: No such file or directory
Jul 01 01:08:29 ubuntu cupsd[8324]: pam_unix(cups:auth): Couldn't open /etc/securetty: No such file or directory
Jul 01 01:08:39 ubuntu cupsd[8324]: pam_unix(cups:auth): Couldn't open /etc/securetty: No such file or directory
Jul 01 01:08:39 ubuntu cupsd[8324]: pam_unix(cups:auth): Couldn't open /etc/securetty: No such file or directory
解决的办法就是新建这个文件/etc/securetty,内容为
1 check the latest docker-compose version
https://github.com/docker/compose/releases
2 run the command
curl -L https://github.com/docker/compose/releases/download/1.25.0/docker-compose-`uname -s`-`uname -m` -o /usr/local/bin/docker-compose
chmod +x /usr/local/bin/docker-compose
ln -s /usr/local/bin/docker-compose /usr/bin/docker-compose
3 here we go.
docker-compose --version