With powerful ffmpeg, we can draw waveform for an audio or video resource.
Default waveform
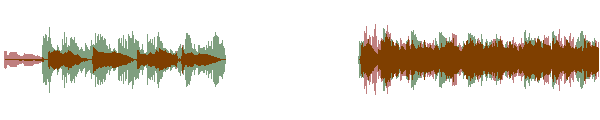
ffmpeg -i stereo_input.foo -filter_complex showwavespic -frames:v 1 output.png
Notes
- Notice the segment of silent audio in the middle.
- Default colors are red (left channel) and green (right channel) for a stereo input.
- The color is mixed where the channels overlap.
- The background is transparent.
- You can change the channel colors with the
colorsoption, such as"showwavespic=colors=blue|yellow". See a list of valid color names or use hexadecimal notation, such as#ffcc99. - If the default colors are white and gray on a black background then your
ffmpegis too old. See the FFmpeg Download page for links to recentffmpegbinaries. - If you get
Option 'colors' not foundthen yourffmpegis too old. See the FFmpeg Download page for links to recentffmpegbinaries. - See the showwavespic filter documentation for additional options.
- If you want a video instead of an image use the showwaves filter.
Fancy waveform
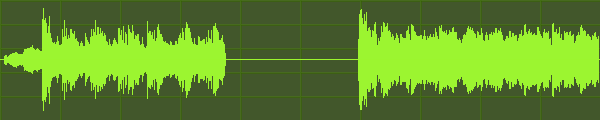
ffmpeg -i input -filter_complex \
"[0:a]aformat=channel_layouts=mono, \
 compand=gain=-6, \
 showwavespic=s=600x120:colors=#9cf42f[fg]; \
 color=s=600x120:color=#44582c, \
 drawgrid=width=iw/10:height=ih/5:color=#9cf42f@0.1[bg]; \
 [bg][fg]overlay=format=auto,drawbox=x=(iw-w)/2:y=(ih-h)/2:w=iw:h=1:color=#9cf42f" \
-frames:v 1 output.png
Explanation of options
- aformat downsamples the audio to mono. Otherwise, by default, a stereo input would result in a waveform with a different color for each channel (see Default waveform example above).
- compand modifies the dynamic range of the audio to make the waveform look less flat. It makes a less accurate representation of the actual audio, but can be more visually appealing.
- showwavespic makes the actual waveform.
- color source filter is used to make a colored background that is the same size as the waveform.
- drawgrid adds a grid over the background. The grid does not represent anything, but is just for looks. The grid color is the same as the hideous waveform color (
#9cf42f), but opacity is set to 10% (@0.1). - overlay will place
[bg](what I named the filtergraph for the background) behind[fg](the waveform). - Finally, drawbox will make the horizontal line so any silent areas are not as ugly.
Gradient example
Using gradients filter
ffmpeg -i input.wav -filter_complex "gradients=s=1920x1080:c0=000000:c1=434343:x0=0:x1=0:y0=0:y1=1080,drawbox=x=(iw-w)/2:y=(ih-h)/2:w=iw:h=1:color=#0000ff[bg];[0:a]aformat=channel_layouts=mono,showwavespic=s=1920x1080:colors=#0068ff[fg];[bg][fg]overlay=format=auto" -vframes:v 1 output.png
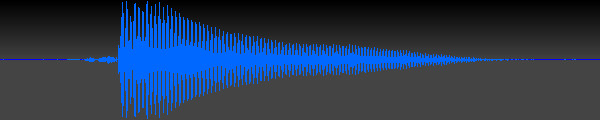
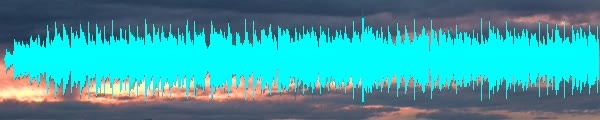
Image background
Of course you can use an image or video instead for the background:
ffmpeg -i audio -i image -filter_complex \
"[1:v]scale=600:-1,crop=iw:120[bg]; \
 [0:a]showwavespic=s=600x120:colors=cyan|aqua[fg]; \
 [bg][fg]overlay" \
-q:v 3 showwavespic_bg.jpg